Perhaps one of the most under-utilized features in O-Calc Pro is the ability to add Notes to an item. In addition to components that utilize pole capacity, it is also possible to add elements to the inventory list that do not contribute to the loading on the pole at all. One such item is a note.
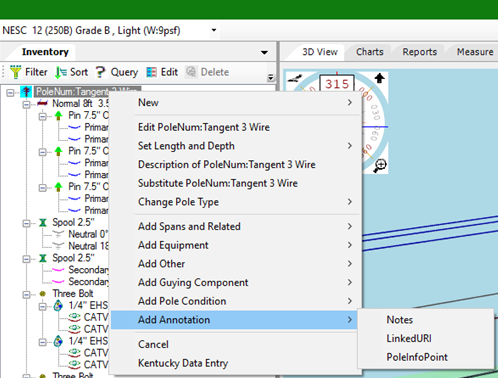
A note can be found by right-clicking on an item, either in the Inventory or 3D View panel, and in the pop-up window moving the cursor over the “Add” option. In some versions of O-Calc, this “Add” list may be broken up into different categories. This image below shows that you would find a note under “Add Annotation”.
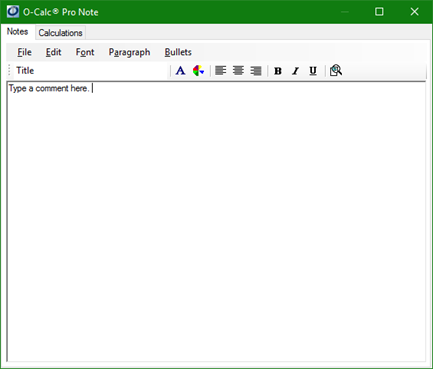
Once you select “Notes” from this list, the O-Calc Pro Note window opens. In this window, there is a tab for “Notes”, and another for “Calculations. The Notes window is similar to Microsoft’s Notepad accessory, and allows a user to type in a comment regarding whatever feature they have added the note to. There is also an area for the title of the note, which is what displays in the Inventory panel. Notes can utilize different fonts, font colors, paragraph formatting, bullets and numbering, and even have images inserted into them using the various drop-down menus along the top of the window.
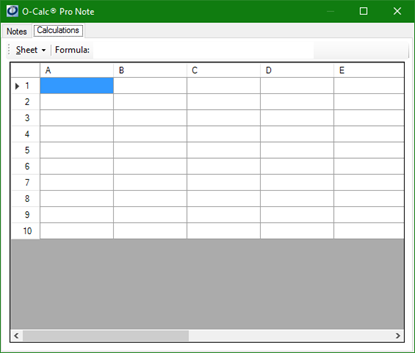
The “Calculations” tab, when viewed, resembles an excel spreadsheet. This window can be used to set and store values, use formulas, and once created may be attached to multiple items on the pole using the drag-and-drop functionality. The “Sheet” drop down list allows the user to add rows, as well as use the “Item Attribute…” option to select an attribute belonging to the item that the note is being added to, and copy that attribute directly into the spreadsheet.
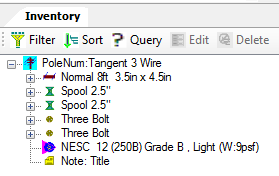
Once Notes and Calculations are entered, the user can select “Save” from the “File” drop-down list. The window closes, and the note is added to the Inventory panel using the same parent-child connections used between different items in the list. In the example image below, the note is added to the pole, so it shows on the same level in the hierarchy as other items added to the pole, such as insulators and the loadcase.
Once the note is added to our Inventory, it is possible to select (or highlight) it and view its attributes in the Data Entry panel. Initially the attributes will display like this:
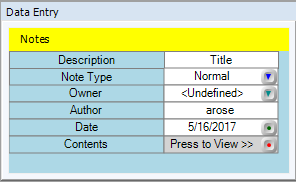
Here, the “Description” field shows that title of the note as entered earlier. Additionally, there are fields for the “Note Type”, “Owner”, “Author”, “Date”, and an option that allows the user to view the content of a Note. The “Author” and “Date” are populated automatically. The red button alongside the “Contents” attribute allows the user to view the text of the note or the calculations page. What is unique here is the “Note Type” field. By default, this field is set to a ‘Normal’ note. Normal notes are displayed on the Analysis reports that O-Calc runs, and will appear on the last page of the report like so:

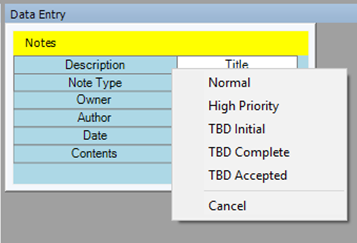
Notice that the symbol for a normal note is a yellow, post-it type icon. We are also able to change the “Note Type” attribute to ‘High Priority’, ‘TBD Initial’, ‘TBD Complete’, and ‘TBD Accepted’ using the blue drop-down arrow alongside the “Note Type” attribute.
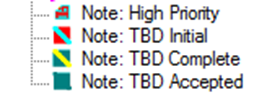
These other note types can be used to help communicate the status of a project across an organization. A ‘High Priority’ Note could be used to indicate a pressing issue that must be considered during the modeling of a structure in O-Calc, with the ‘TBD’ status types for a note could be used to indicate what stage a structure is in, perhaps for a newly constructed pole. Below are each of the note types and their associate Symbols.
Recent Comments