Within the O-Calc Pro application, a variety of features are made available to a user. These available features are linked, in part, to the user level that is assigned. To determine what user level you have been assigned, simply open the application and check the status in the bottom left-hand corner, beneath the capacity window. It should display something like this:

Figure 1. Shows Normal User Level
Some features in O-Calc are only accessible when the user has been assigned to the Administrative user level. Changes to certain attributes are locked until the user has activated or received Administrative permission. These permissions are regulated based on the Windows Security Group a person is in. An IT representative will often need to create a Window’s User Group entitled “O-Calc Administrators”. Once the user’s profile has been established under the “O-Calc Administrators” security group, the user will be able to run O-Calc Pro in the “Administrative” mode. Please see the O-Calc Pro user guide for more information on this topic. Note: these instructions are for Microsoft Windows 10 Users.
-
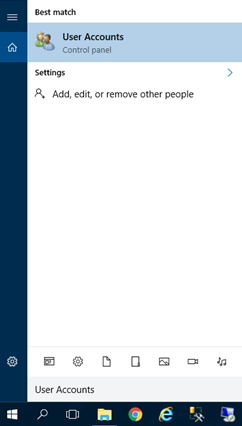
Navigate to the “User Accounts” options window for your computer:
- Using the magnifying glass search option, search for “User Accounts”
-
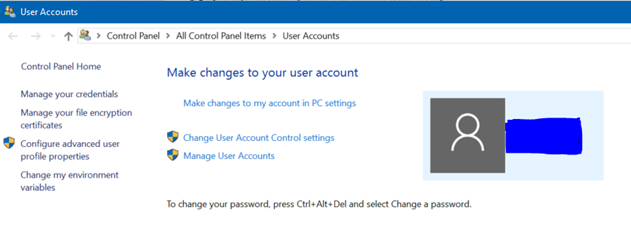
The user accounts dialog box will open:
-
Create the “O-Calc Administrators” Security Group.
-
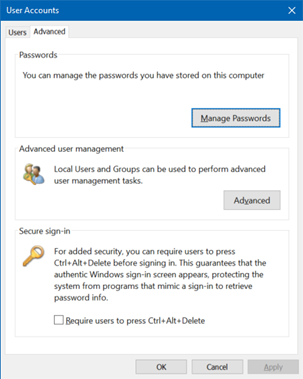
Select “Manage User Accounts” and select the “Advanced” Tab in the window that opens.
-
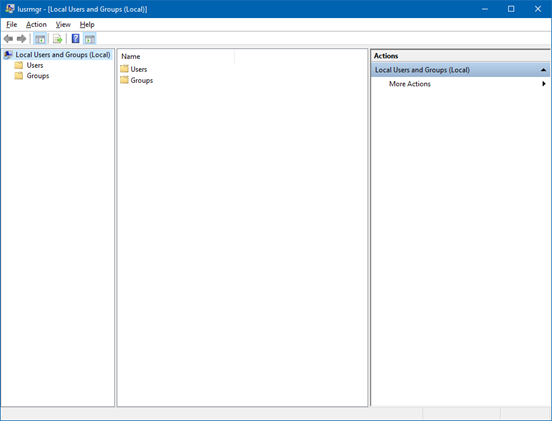
Under the “Advanced User Management” header, select the “Advanced” button. In the dialog that opens, select the “Groups” folder from the left-hand side column.
-
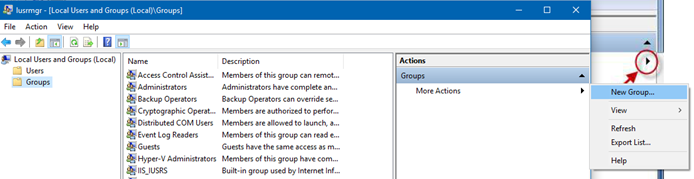
Once the “Groups” folder is highlights, you will see a list of all established groups for your computer. If you do not see a group called “O-Calc Administrators”, select the “More Actions” arrow on the right-hand side of the window and select “New Group…”
-
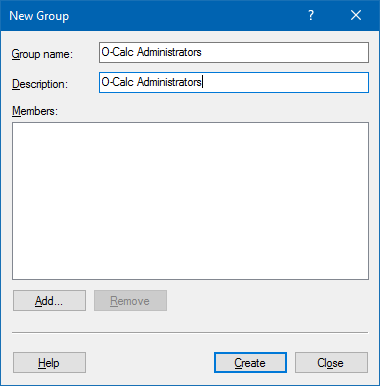
In the New Group window, set your display to look like the image below.
-
-
Add Users to the new Security Group.
-
Once the Group name and description have been entered, use the “Add…” button to add a user to the group. This will open a window to search for users to add.

-
Once your location is set, enter the user’s name in the test box. Then, click “Check Names” to match to organization users. Examples of names can be seen by clicking on the “Examples” hyperlink.
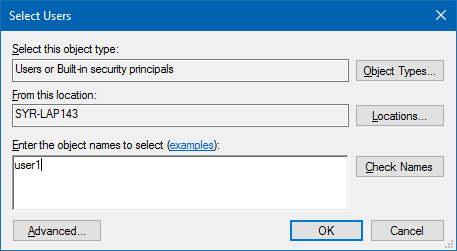
- Click “Ok” on this window when finished, and then click “create” in the new group dialog window.
- Apply the changes while closing the remaining open windows.
-
-
Restart your computer.
- Log in and launch O-Calc Pro.
- Once it has started, right-click on the “User Level: Normal” at the bottom of the window.
- Select “Set User Level to Administrative”.