There are a number of ways to view capacity utilization in O-Calc Pro. Within the Capacity Display Window, the user may view the capacity as a percentage or as a numeric display that includes bending moment values for the pole. This window displays the bending moment for the entire pole. However, it is also possible to view bending moment at a particular point anywhere on the pole. This is done with the addition of a Pole Info Point.
Adding a Pole Info Point
Begin by selecting your pole, either in your inventory panel or in your 3D View (it will be highlighted in yellow).
Then simply right-click on your pole, navigate to the “Add” option, and select “PoleInfoPoint” from the list of additions.

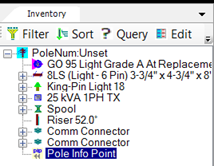
The Pole Info Point will appear in your Inventory Window.
And will have a data entry window that looks like this:
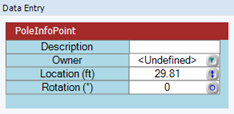
Within this data entry window, the user can assign a name for the Pole Info Point. For example, a name identifying the placement of the point on the pole, like “Crossarm PIP” or “Communication PIP”. There is also an option to assign ownership to the Pole Info Point, and set it’s location on the pole in terms of height above groundline and rotation.
In the 3D view, a marker will be visible to show the location of the Pole Info Point.
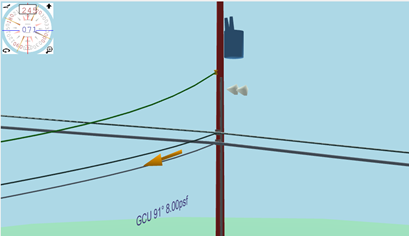
**Note: If there is no marker on the pole, an option in 3D View needs to be enabled.
Enabling Damage and Decay Markers
Since a Pole Info Point is marked in a manner similar to Damage and Decay on a pole, these labels need to be enabled in 3D View.
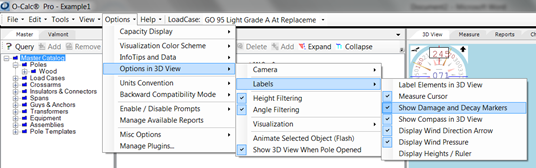
Navigate to the “Options” Menu, then to the “Options in 3D View” list. Select the “Labels” list, and ensure that the “Show Damage and Decay Markers” option is enabled.
Once these labels are turned on, the marker indicating the placement of the Pole Info Point should be Visible.
Information displayed by the Pole Info Point
With the Pole Info Point on the pole, the user can view loading information for a specific point on the pole. To do so, place the cursor of the mouse over the Icon for the Pole Info Point that appears in your inventory window. When the cursor is hovered over the icon, a pop-up display of information should display. It will look like this:
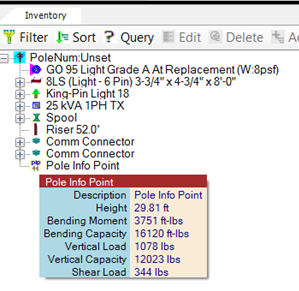
This pop-up window displays the height that the Pole Info Point is set to, as well as loading information on the structure at that point. As the attachment height and rotation attributes are changed, the loading information will also change, displaying the recalculated loading at that location.
**Note: If the pop-up window does not display, an option in Info Tips and Data needs to be enabled.
Enabling Component Load Information
To ensure that the pop-up will display, navigate to the “Options” Menu. From here, hover your cursor over the “InfoTips and Data” list, and ensure that the “Component Load Info Tips Enabled” option is checked.
