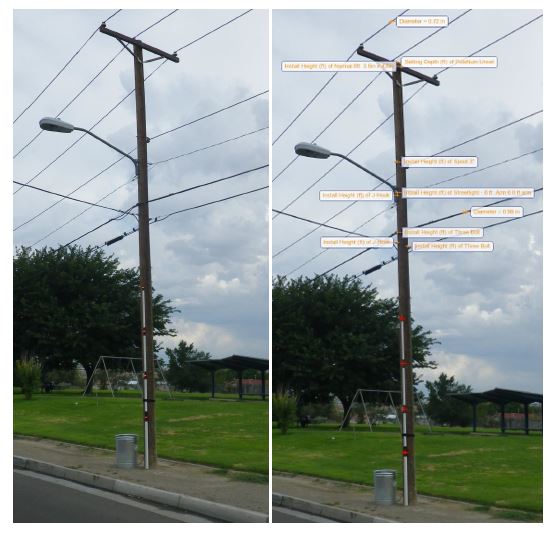
O-Calc Pro is equipped with a fully functional monoscopic photogrammetry subsystem that allows for extremely precise measurements to be made from photographs. Unlike the less accurate systems sometimes used by alternative pole loading tools this system uses a precise model of the lens stack on a particular camera model as well as series of retro-reflectors of known geometry to precisely correct lens and geometric distortion in an image to allow centimeter accurate measurements to be taken of poles, spans, equipment, guy anchor lead lengths, etc. (See the following for more information https://www.youtube.com/watch?v=ffGXTkMM7pc )
O-Calc Pro ships with a large database of cameras for which the required lens data is already determined, but you may have a scenario where you wish to use a camera that is not included in the database. When this happens the integrated Lens Calibration Tool allows you to determine the lens distortion and to add the camera in question to your database of cameras.
Step 1) Invoke the Lens Calibration Tool
Select Tools>Misc>Photo Measurement>Lens Calibration.

Step 2) Print and photograph the calibration chart
Select the Step 1 tab.
Click the Click here to print calibration chart button and print the calibration chart.
Note: You will need the printed calibration chart and the camera you need to calibrate to proceed to the next step.
Click the Next button or select the Step 2 tab.
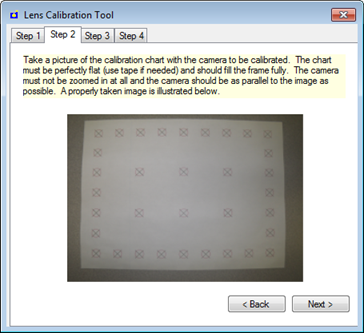
Using the camera that needs to be calibrated take a picture of the calibration chart that you printed out on the Step 1 tab.
Note: Use the detailed directions provided on the Step 2 tab to get the best possible image. Incorrectly taken images of the calibration chart will result in the lens calibration to be incorrect.
Save the image you took of calibration chart.
Click the Next button or select the Step 3 tab.
Step 3) Load the calibration chart image
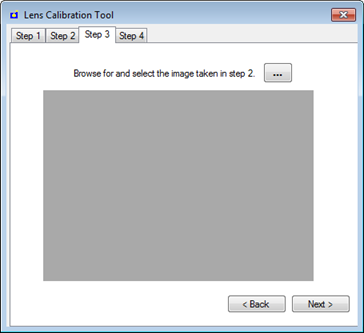
Click the browse button 
and navigate to and select the image you took of the calibration chart and click Open.
Your image should display in the Step 3 tab.
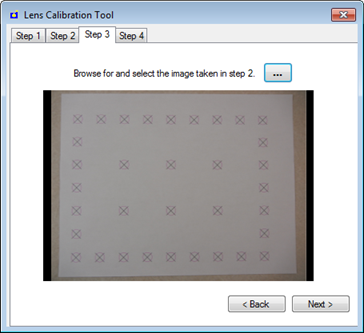
Click the Next button or select the Step 4 tab.
Note: Verify the Camera Make and Camera Model that display are correct.
Step 4) Digitize the calibration chart
The following are the most critical steps and should be performed carefully.
Using the mouse wheel to zoom in and out, and the right mouse button to pan, click carefully and accurately on the “x” in the center of each target point starting with the upper lefthand most point and proceeding in a clockwise faction around all of the outside points.
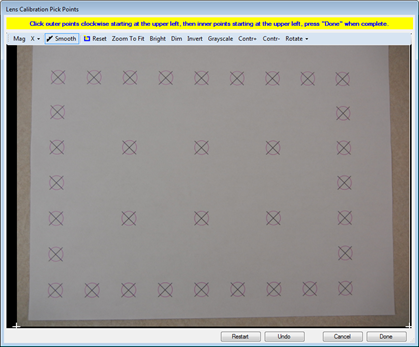
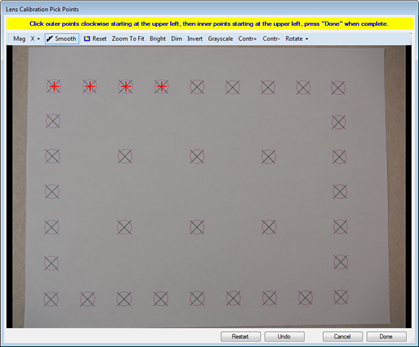
After you have selected all of the points select the left top most interior point and again select all of the remaining interior points carefully and accurately in a clockwise fashion.
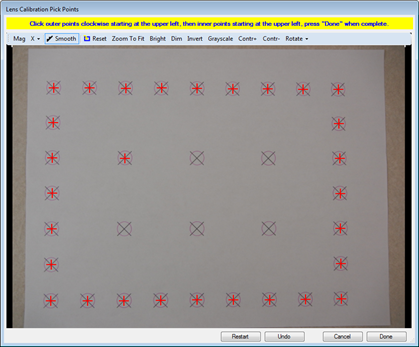
If you pick a point with poor accuracy or our of order the “undo” button can be used ti unselect the point or points and you can re-select them more precisely.
When all points are selected, click the Done button.
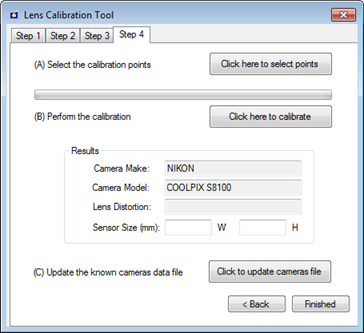
Step 5) Calculate, review and save the calibration
Click the Click here to calibrate button. The calibration status bar will display the lens calibration progress.
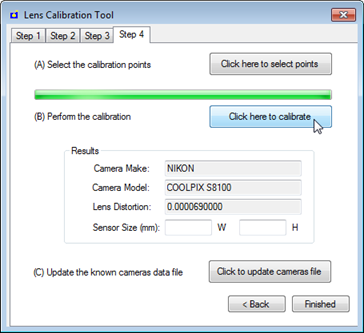
When the lens calibration is complete and the progress bar has reached the completion point the Lens Distortion field will automatically be populated.
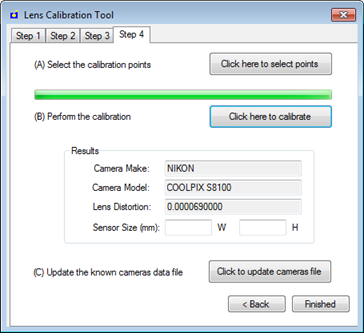
Press the “Click to update camera file” button.
Select OK to the verification message that the camera has been added to the supported camera database.
Select Finished to close the Lens Calibration Tool.
You can now use images taken with the newly added camera in the photogrammetric measurement system.
Any Images that are added into O-Calc can be included as separate reports, found under the Reports tab as either Pole Images or Pole Image Annotated.
These reports allow the user to export the photos that they may have used with O-Calc Pro’s Digital Measurement Technology. A user can either print the original image, or print an image with the annotated attachment heights and other measurements taken with the Calibrated Visual Target.