The O-Calc Pro Master Catalog features an extensive list of components that can be included in a pole model. Of those components, the loadcase component acts as the driving force behind the calculations that are performed. The ‘Load Cases’ folder contains the safety requirements for the National Electric Safety Code (NESC), General Order 95 (GO95), and some international standards such as CSA and AS-ANZ for Canada and Australia, respectively.
These loadcases are built with numerous attributes that play a critical role in the calculation of a pole’s maximum capacity utilization. Some of these attributes include temperature under various conditions, ice and wind parameters, load factors and strength factors in the NESC loadcases and safety factors in the GO 95 Loadcases. Each loadcase was created after the safety standards set forth in the associated safety code – therefore, these are the required values that should be used when modeling a structure in O-Calc Pro.
|
Load Case Subfolder |
Associated Code |
|
NESC 2017, NESC 2012 |
|
|
GO 95 |
|
|
CSA 2015, CSA 2010 |
|
|
AS-NZS 7000 2010 |
However, there are situations where a customer may wish to modify these loadcases to be more conservative in their calculations. One might want to account for more ice than is required, or higher wind speeds in areas prone to tropical storms or tornadoes. Additionally, one might want to modify temperature values that are used in sag calculations on spans. Each of these adjustments could be made by adjusting a loadcase to create a custom one.
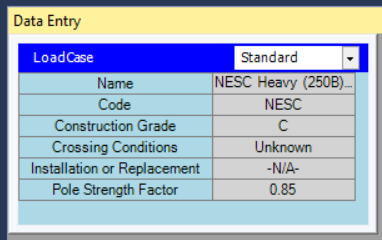
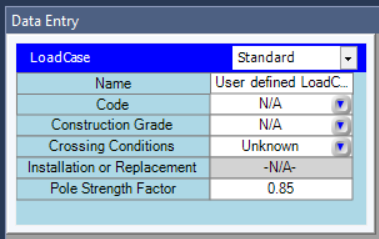
When modeling a pole and adding a loadcase, a user can select the loadcase and view its attributes in the Data Entry Panel. The first thing to notice here is that all attributes are grayed out – indicating that it is not possible to edit them. This is because all loadcases from the master catalog are what we call ‘sealed’. This is because these values are directly from the associated safety standards, and are therefore locked for editing.
To edit a loadcase, first a user must ‘unseal’ it. By unsealing a loadcase, the user can edit the attributes shown in the data entry window. However, once those values are changed, it is not possible to re-seal the loadcase. Instead, it becomes a custom loadcase that a user can save into their User Catalog for later use.
Here is a screenshot of what a typical loadcase would look like in the Data Entry Window; note the attributes are grayed out.
To unseal this loadcase, simply select the loadcase in the Inventory, right-click on it, and select ‘Unseal this LoadCase’. This will generate a prompt, asking if you are certain that you would like to perform this action.
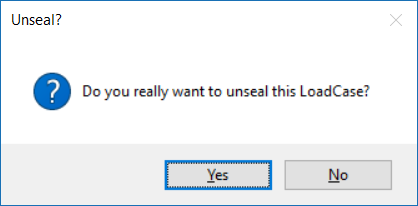
Select ‘Yes’; notice the symbology change in the Inventory list.
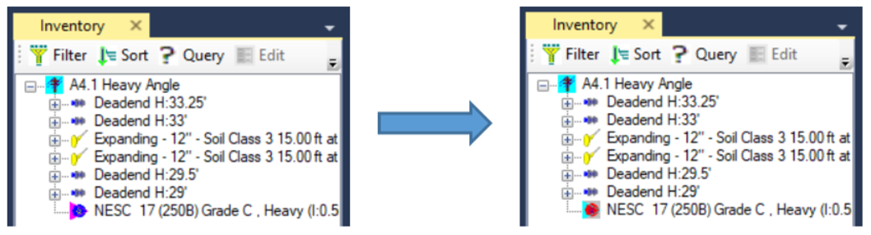
Next, notice that in the Data Entry Window, most of the attributes have been essentially unlocked, allowing them to be edited.
Now it is possible to adjust certain parameters, to create a customer loadcase. For example, the ‘temperature’ filter shows the values that are used as the nominal (current), minimum, and maximum temperatures used when modeling certain types of tension. Specifically, the modes ‘Sag Tension’ or ‘Tension Sag’ use these temperature values to model what a spans tension or sag would be, given that temperature. Now, this can be changed in the Tension Calculator tool for each span, but a custom loadcase can also be used to essentially set new default temperature values. If, for instance, I wanted to always account for a maximum temperature of 130° and a minimum temperature of -5°, I could input these values into a custom loadcase. Then, each time I used this loadcase for a calculation, it would have my temperature values.
These are my initial and modified temperature values:

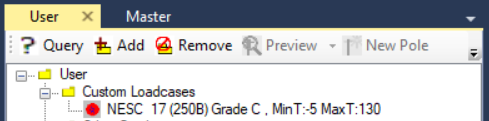
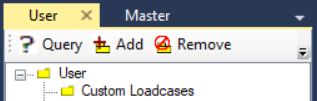
Now this loadcase can be stored in the user catalog for future use. A subfolder can be created in the user catalog by right-clicking on the word ‘User’ at the top of the catalog, and selecting “Add Subfolder”. This subfolder could be called ‘Custom Loadcases’.
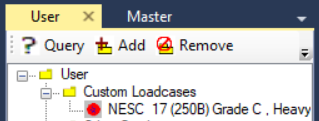
Once created, the loadcase can be dragged-and-dropped into the ‘Custom Loadcases’ folder, using a left-click. This will prompt the user to ‘Add Copy to folder’. The loadcase is added to the folder, with the same name that it originally had.
One last thing that could be done is to change the description of this loadcase in the User catalog, so that it is easier to identify. To do this, right-click on the custom loadcase in the folder, and select ‘Description of…’ to change the name displayed in the User catalog.